Finish tab

Finish is the pixel and compositing stage after Develop. It stacks retouching, paint, isolated image regions, fills, gradients, and adjustments over the developed photograph. Every layer remains editable and is represented inside the graph's Finish group.
Layer pages
 Pixel layer
 Smart layer
- Isolate layer
 Dodge & Burn layer
 Fill layer
 Gradient layer
 Adjustment layers
 Groups and clipping
 Masks and selections
 Layer effects
- Finish toolbar
Reading the stack
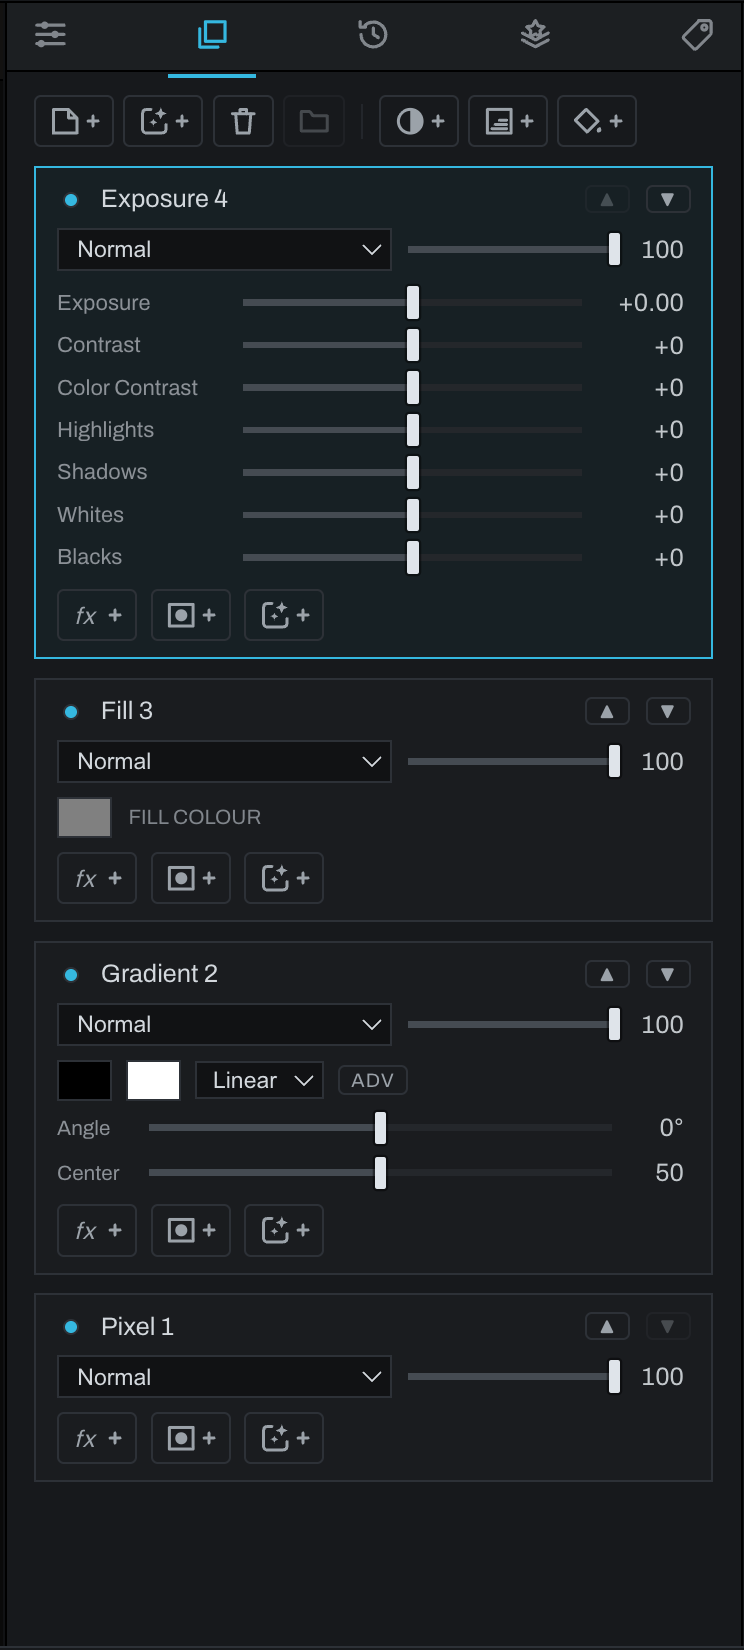
The top row composites last and appears in front. Click a row to make it active. Ctrl/Command-click or Shift-click as supported selects multiple rows for grouping. Use the visibility dot to bypass a layer without deleting it. Use the up/down buttons or drag/reorder actions to change order.
Every layer has a blend mode, opacity, and optional mask. Click a layer's content or mask area to choose what its controls edit. Right-click a row for rename, grouping, movement, clipping, mask, and delete commands.
Add-layer toolbar
The icon row at the top adds Pixel, Smart, Adjustment, Gradient, and Fill layers. It also deletes the active layer and groups selected adjacent layers; when a group is active, the same position becomes Ungroup. Point to an icon to read its name and result in the status bar.
Brush panel
When a brush-based tool is active, the lower panel holds size, flow/opacity, softness, strength where relevant, tip, texture, and tip-specific controls. [ and ] change brush size while working.