
Depth Lighting
Depth Lighting uses inferred scene depth to relight forms with a movable light rig.
Controls
- Light rig adds, selects, positions, and removes lights. The rig's rings, lines and handle borders take the LINES colour every overlay shares, automatic the opposite of the photograph so the rig reads over any scene; a LINES row under the rig buttons sets it, as in Grid Warp. How thick the rig draws is the Thickness row beside it, which is the Shape outline thickness preference under Interface: it sets the thickness for every photograph, the shape overlays included, and ships at 2 pixels. A handle's fill still says what the light is: amber emitting, near-black dark, or the light's own colour. Selected-light controls adjust that light's contribution. A point light's Depth can be read from the scene with From scene, which sets it to the depth plane's value where the light sits, so a lamp placed on a streetlamp stands at the streetlamp's distance.
- Levels shapes the depth map as Depth Lighting reads it, with the widget a layer's Depth mask carries: below Black is the far floor, above White the nearest relief, Gamma bends the depths between, and the falloff handles on the top edge soften either end so the cut does not draw a matte line. This section only. Pull Black up and White down and the soft step the model draws around a subject becomes a hard one, which takes the bright or dark band off the background along the silhouette.
- Color tints a light. An emitting light adds its color where it reaches; a dark light, one with a negative Strength, casts a shadow of its color, so a red dark light leaves red shadows rather than cyan ones.
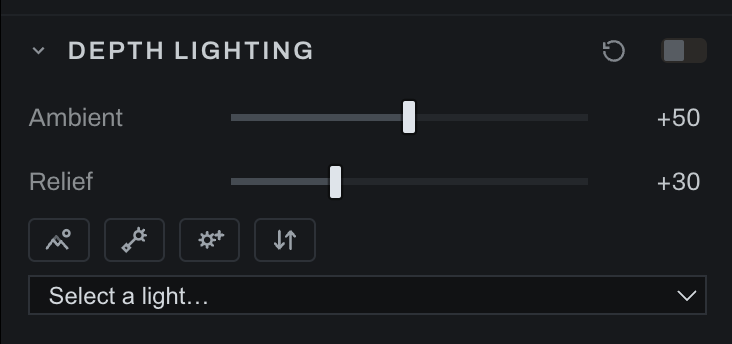
- Ambient sets baseline illumination outside direct lights.
- Relief controls how strongly depth differences are interpreted as shape.
- View depth shows the plane itself; Invert flips it when the inferred order is reversed. Every section that reads the depth map carries the View depth eye.
Begin with one light and moderate Relief. Position it in the on-image rig, then use Ambient to keep unlit regions from collapsing. Add lights only when one source cannot describe the intended result.
Depth is inferred from the photograph, not reconstructed geometry. Watch silhouettes and overlapping objects for halos: the Depth Map section's Edges control takes them off, and Flatten calms a rippling wall. The relief shading itself runs to the last pixel of each surface, and the model's own soft step between a near thing and a far one takes the shading of what surrounds it rather than a seam of its own; this section's Levels can narrow that step. The shading reads the shape of things at the scale of a head or a fold, not the ripples the model draws in hair, cloth and pavement: a surface flatter than the model can resolve reads as flat, so a lamp placed low over the ground shades the ground evenly rather than in blotches. Relief now shows on surfaces it used to leave flat; lower it if a subject reads too sculpted. Reduce Relief when depth errors remain visible. A very strong dark light rolls off toward black on the flanks that face it rather than clipping.
Lens Flare
The Lens Flare section, below Depth of Field, draws the lens's flare for the rig's lights: the source glow, diffraction rays, the chain of aperture ghosts across the frame, an anamorphic streak, and the veiling glare that lifts the blacks around a bright source. Nothing is painted; every element is drawn from the light's position and the lens's character, so moving the light moves the flare and the flare renders fresh at every size, in the export included.
- Which lights flare is chosen per light, in Depth Lighting's selected-light controls or in the Lens Flare section's list. In the rig, every flaring light shows a sun marker where its flare comes from, pinned to the frame edge when the source is off-frame, so the aiming handle and the source are never mistaken for each other. A directional light flares from the frame edge its direction names; its elevation sets how far past the edge the source sits. A point light flares from where it stands.
- Lens picks a preset for the look: modern prime, zoom, vintage, telephoto, wide, anamorphic, phone. Heeler suggests one from the photograph's focal length and lens name but never applies it for you.
- Anamorphic is the streak: its strength, thickness, reach and taper, its angle, its offset from the source along and across its line, and its breakup, the swelling, thinning and clumping a real streak carries along its length. Its color is a ribbon from the source to the streak's end, below the dials: drag a point's handle to place it, click the swatch under it for its color, click the bar to add a point in the color found there, click the X above a point to remove it, and select a point to set its opacity. Single goes back to one color.
- Occlusion reads the depth plane two ways. Around the light, something nearer than it hides the source and the whole flare dims. Across the frame, anything nearer than the light cuts the glow and rays at its silhouette, so a flare sits behind a person or a pole rather than being painted over them; the ghosts and the veil, which form inside the lens, are not cut. Veil by depth lets the glare land on the far plane rather than the near one.
- When Depth of Field is on with a different blade count, the section says so and offers Match, so bokeh and ghosts share one aperture. It is a click, never automatic.
From scene belongs to the selected light. Selecting another light or changing that light while the depth read is pending cancels the answer. Edits to other lights are preserved when the depth arrives.